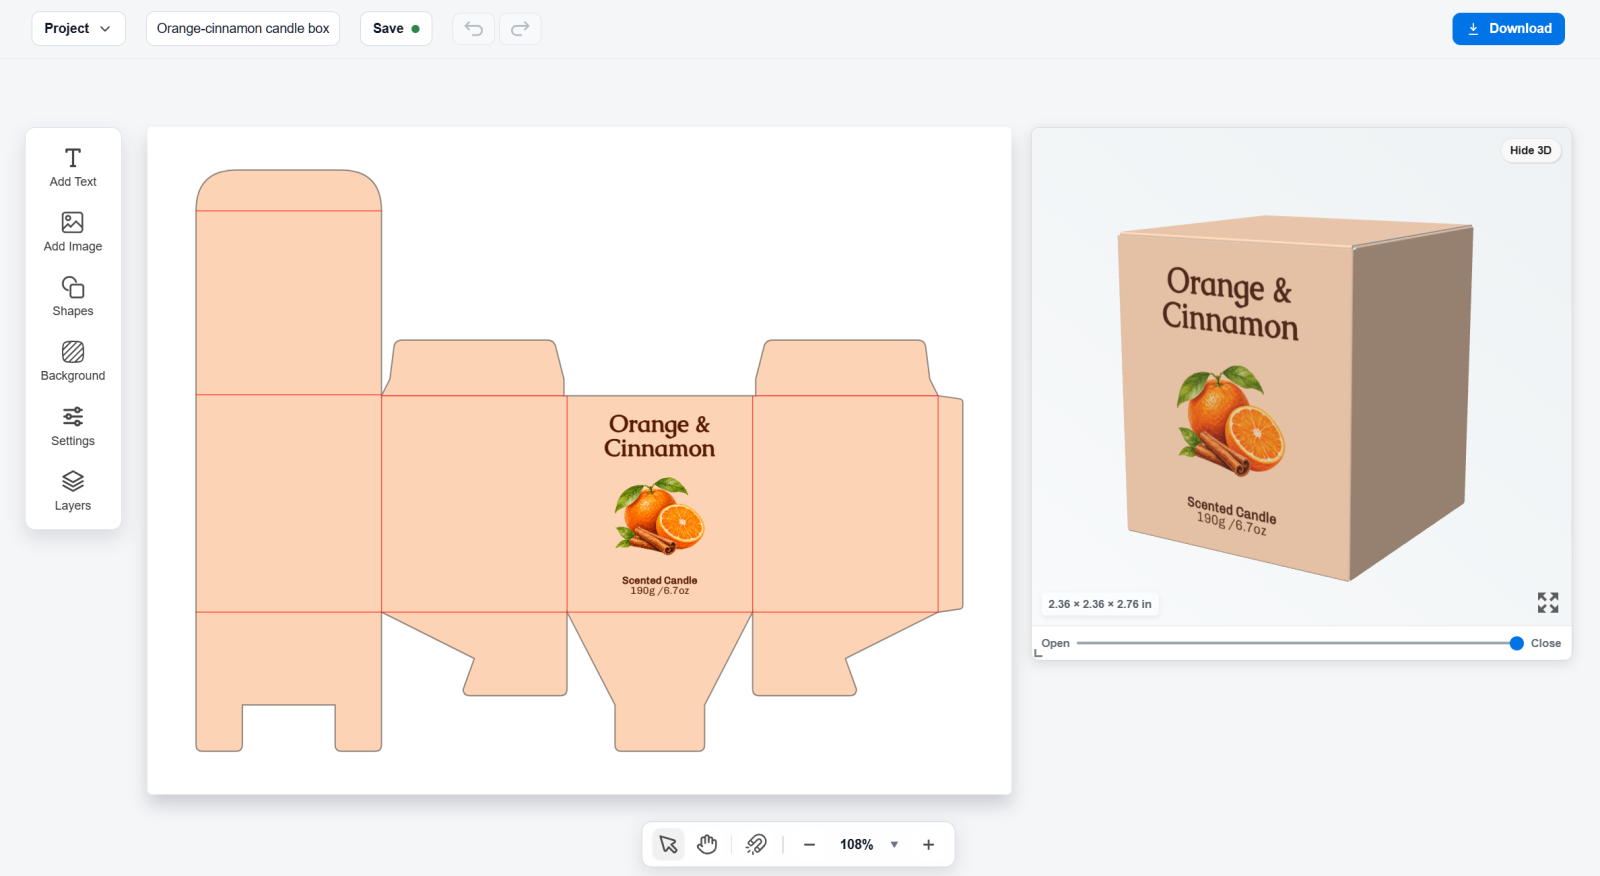
Add your design to the template and see how it looks in 3D.
1. Open a template
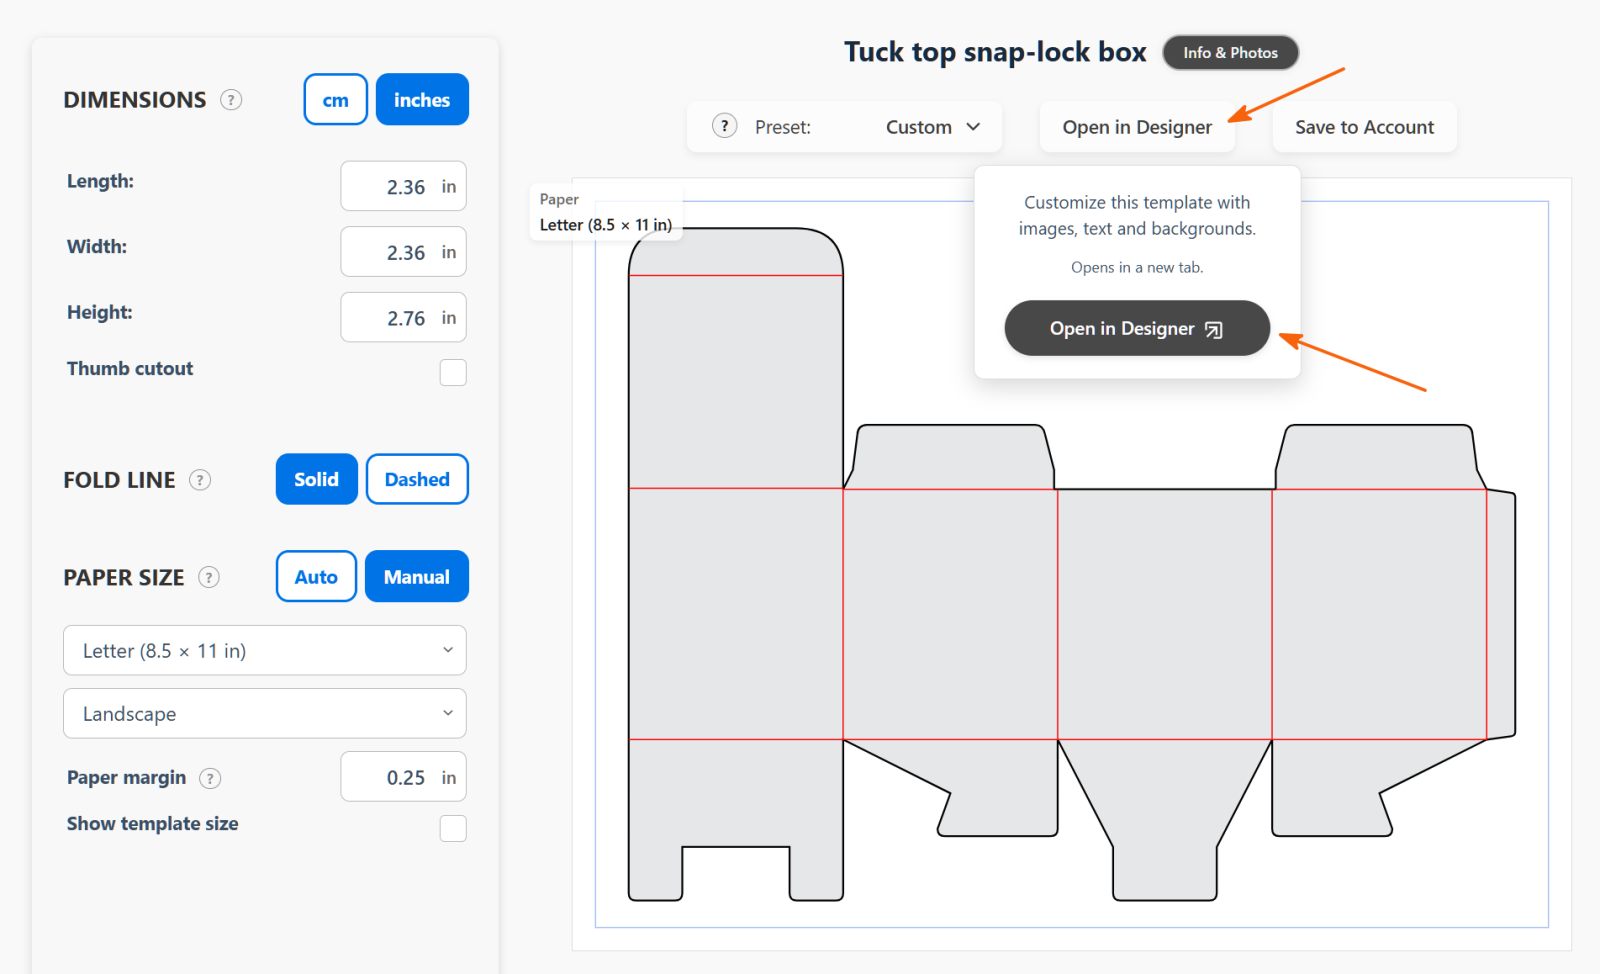
Open the Templates library and choose a template.
Set your box dimensions, then click Open in Designer.
2. Set the background
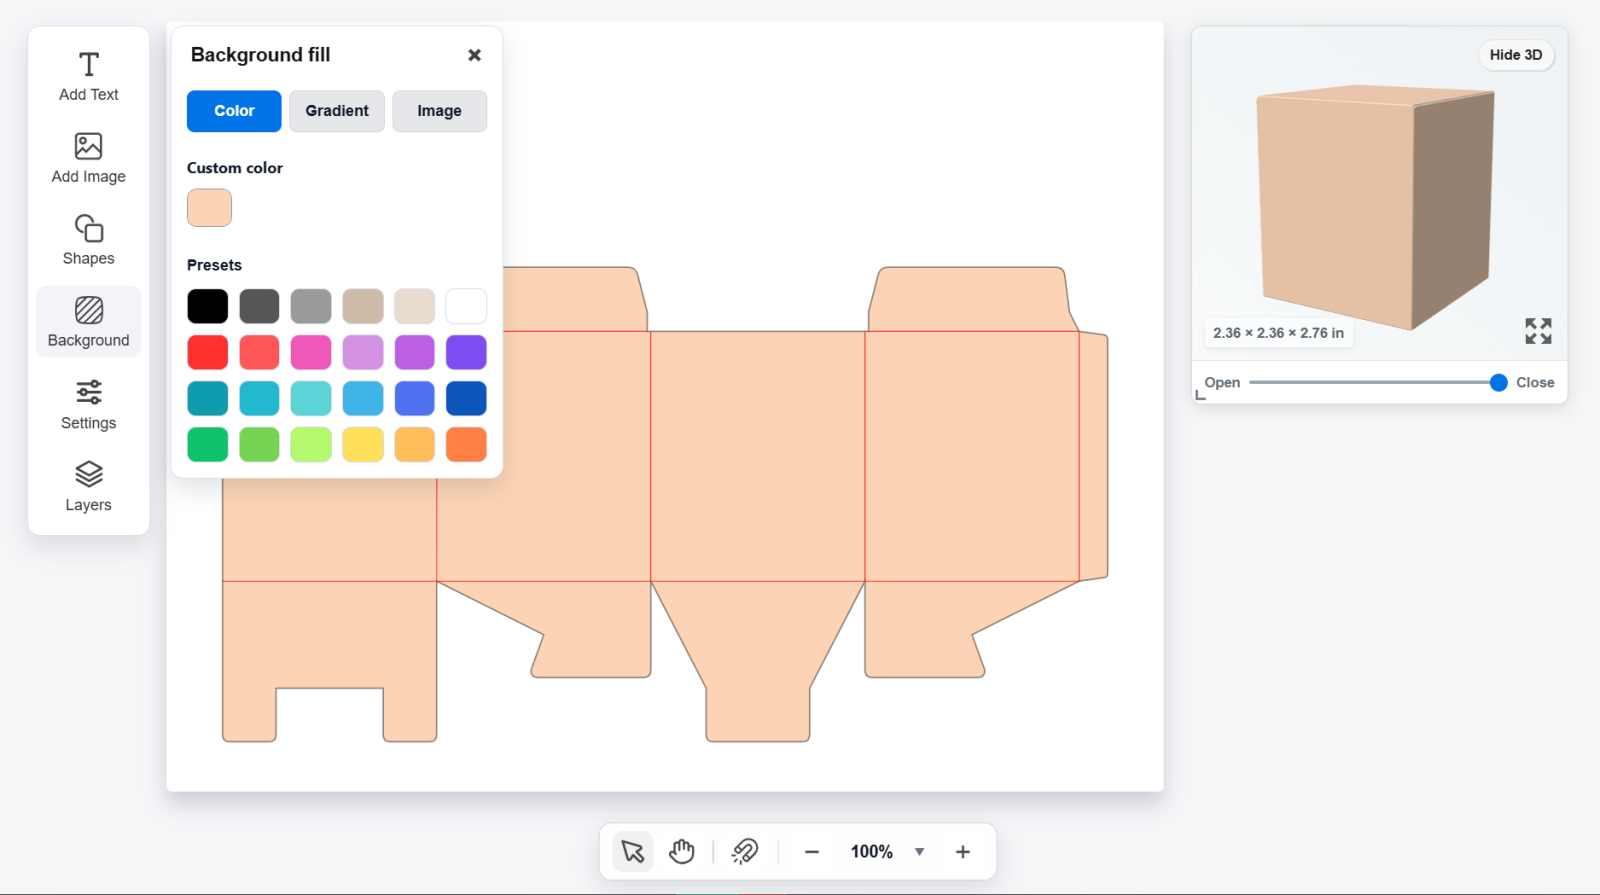
Click Background. Pick a preset color, or click the colored square under Custom color to choose your own.
You can also use Gradient or Image as the background.
3. Add text
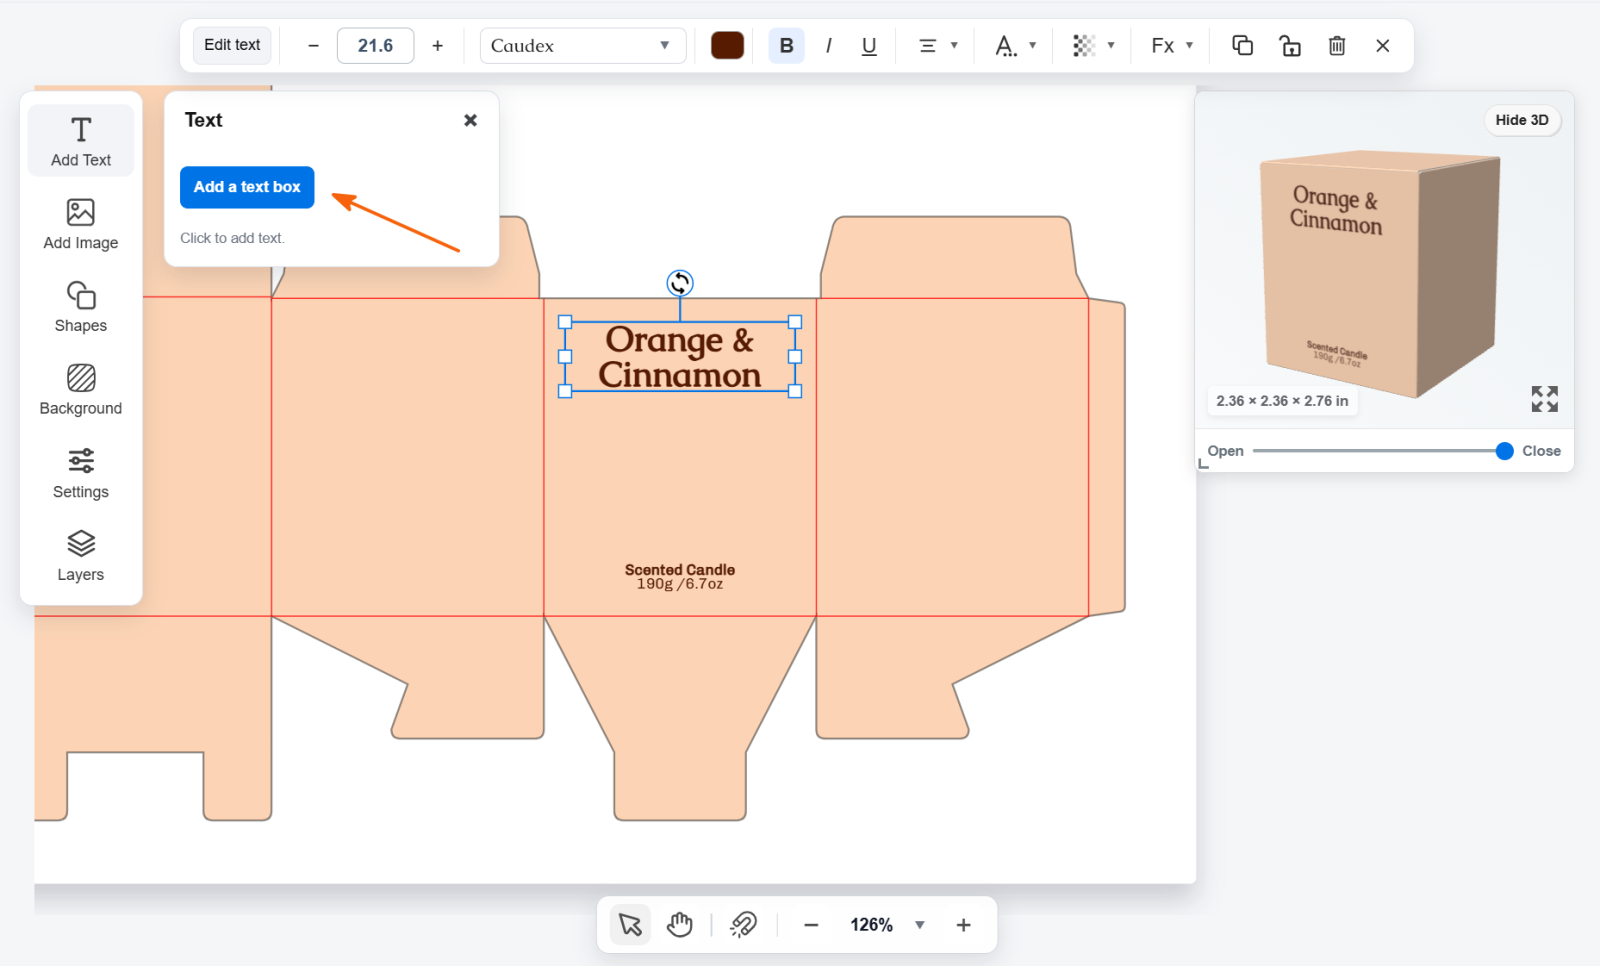
Click Add Text, then Add a text box.
Drag the text box to position it then click the text to enter your own. Use the formatting bar above the template to change the font, size and color.
Add more text boxes for other details.
4. Add an image
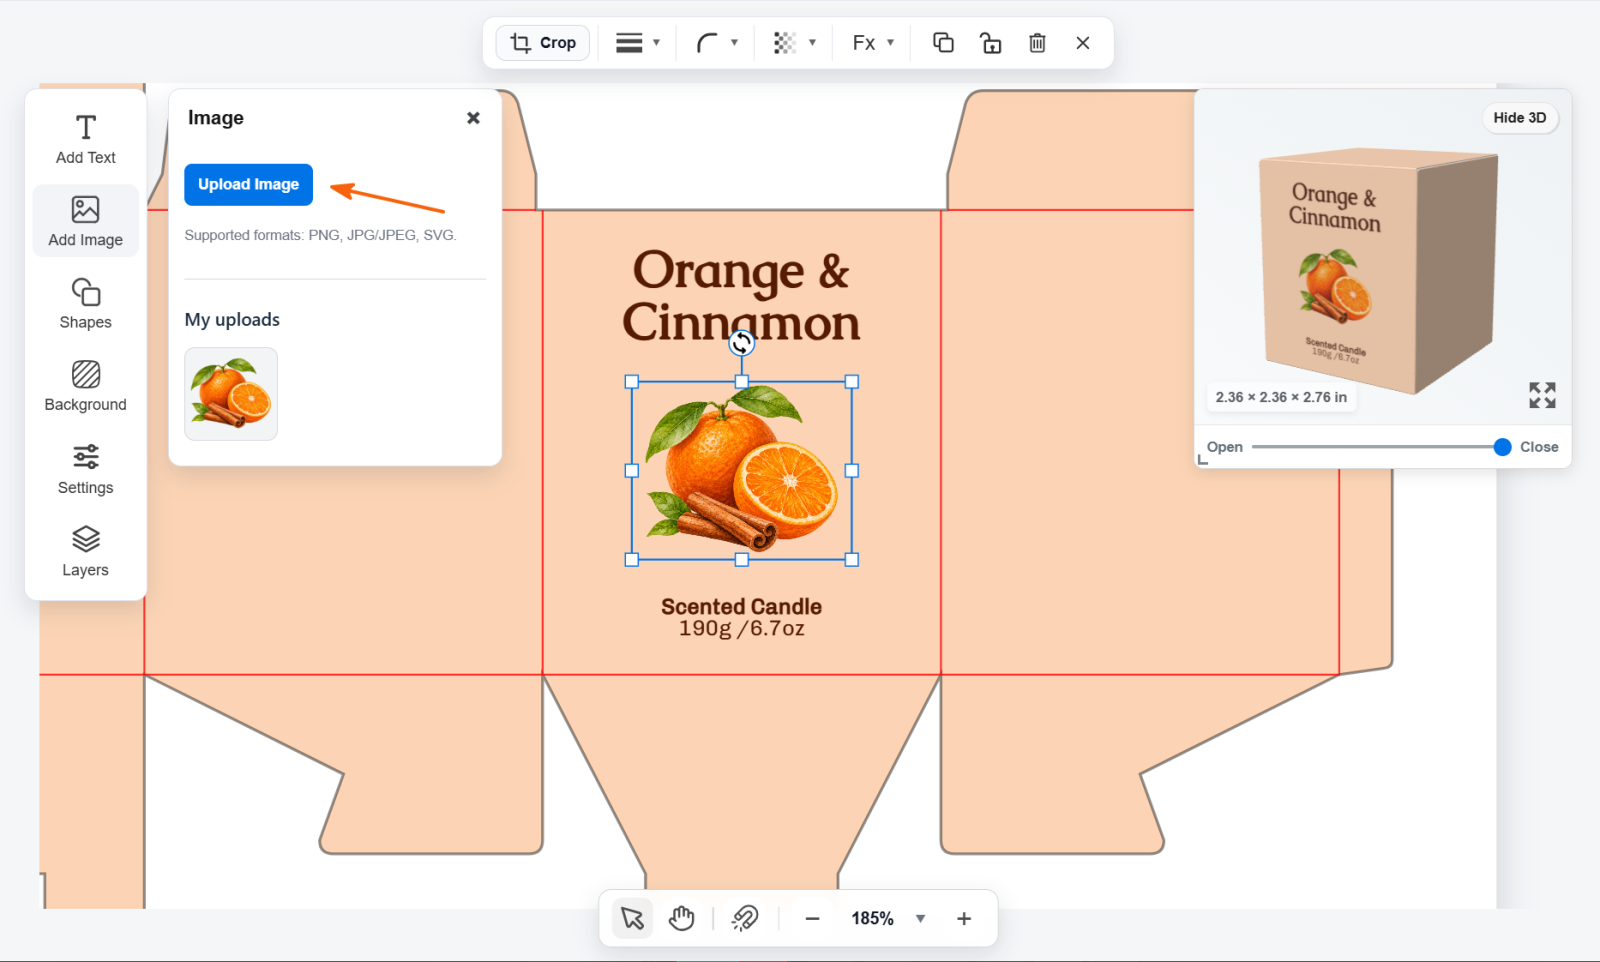
Click Add Image, then Upload Image.
Choose a file from your computer. The image appears on the canvas and in My uploads.
Position and resize as needed.
5. Save and download
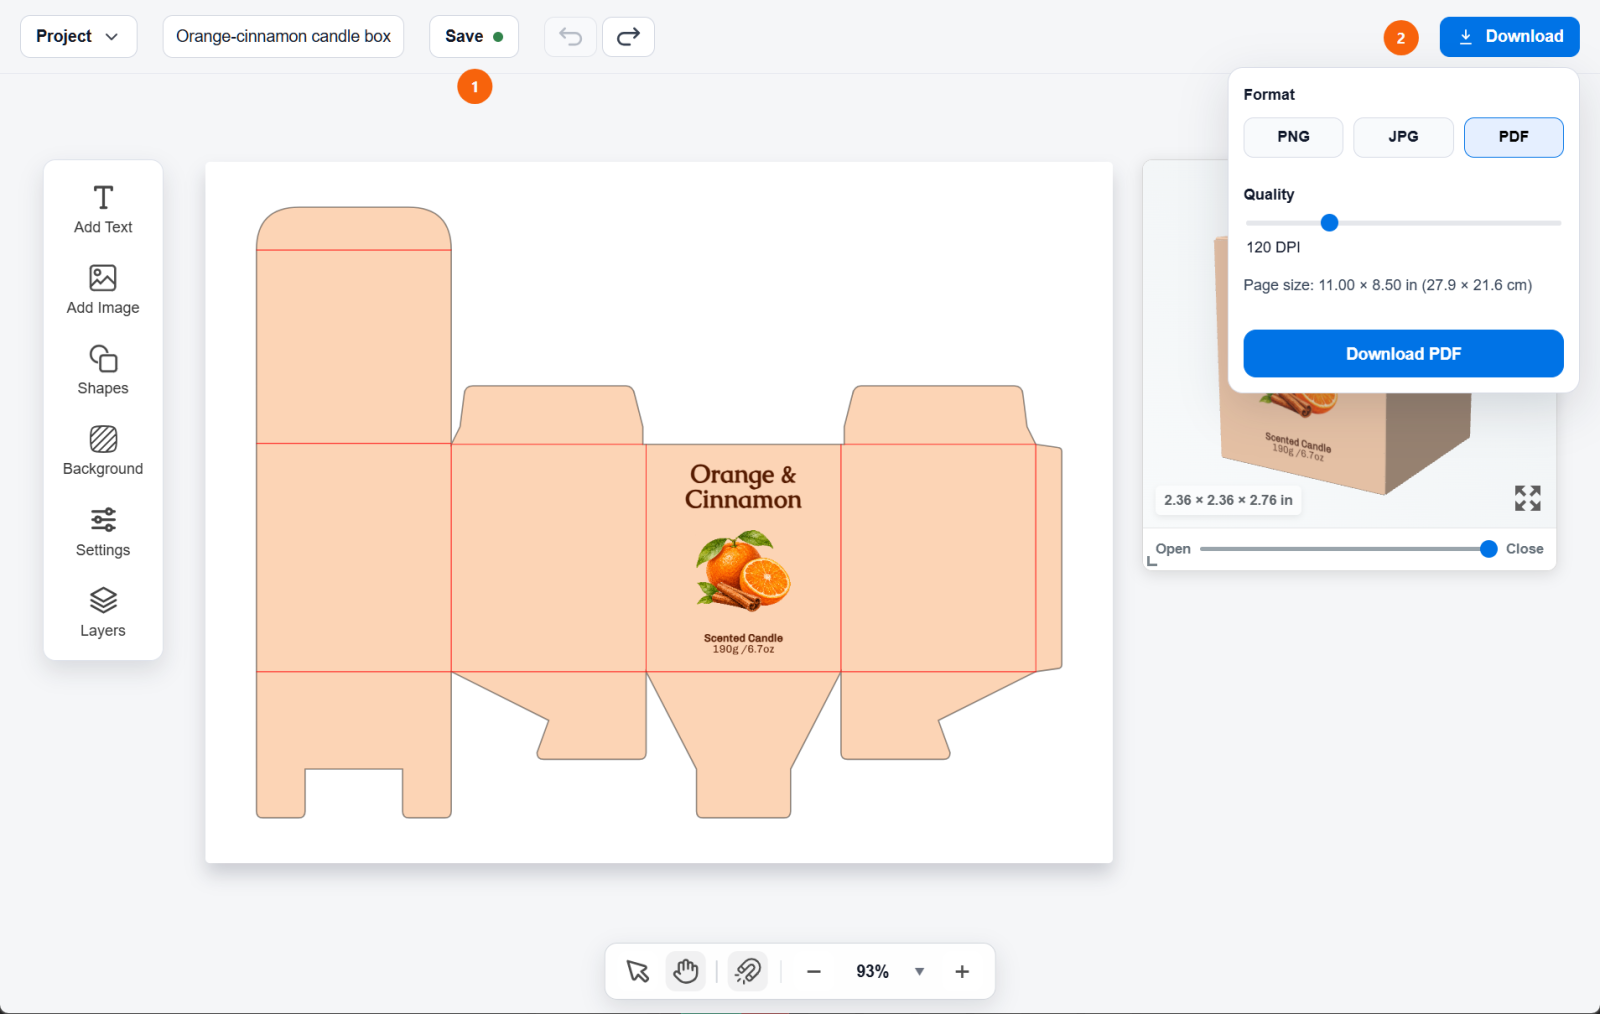
Click Save (1), enter a project name and click Save to Account. If needed, log in or register first.
Your saved project will be available in My designs in your account. After editing it, click Save Changes to save your changes.
To download your design, click Download (2). Choose PNG, JPG or PDF, adjust the image size or quality, then click the download button.